Best Practice Tips for Working with Concrete Countertop Topping Mix
Concrete countertops have become an increasingly popular trend in many homes, particularly among homeowners who are interested in having a custom and unique, creative or industrial look. When installing concrete countertops, it is vital to follow all required steps, including the proper use of concrete countertop topping mix. This is a layer of concrete that is poured on top of an
Countertops Moon Decorative
existing countertop surface in order to give the appearance of a concrete countertop. Topping mixes are composed of cement along with admixtures, like polymers, and sand aggregates. شرح موقع bet365
When working with concrete countertop topping mix, a few important tips should be kept in mind in order to achieve the best results. لعبة الروليت المجانيه Prior to applying a countertop topping mix, it is important to ensure that the substrate base is roughened and cleaned. If the substrate is porous it should be slightly damp to avoid pulling too much water out of the topping mix. Concrete countertop topping mixes should not be poured to a thickness of more than 1/8 inch at a time over the substrate.
Finishing Tips for Concrete Countertop Topping Mixes
A variety of finishes may be used to achieve the look you desire, such as a smooth finish or a textured finish. When applied properly, concrete countertop topping mixes can also be used for repairing and reinforcing an existing concrete countertop, thus extending its longevity.
Excessive troweling should be avoided, as should using an overly wet mix. If the mix is too wet, fine aggregates will settle at the bottom and the surface paste may be soft, whereas over troweling can result in a dusting surface once the concrete has hardened. روليت اون لاين
It is also important to ensure that the concrete does not dry too quickly with fans or blowing air as this may result in surface cracking due to shrinkage.
What You Need to Know about Using Metallic Epoxy
Metallic floor coatings provide an exotic look to residences and retail facilities. With this product, it is possible to create completely distinctive flooring because no two metallic floors are ever the same. Utilizing a polyaspartic or clear epoxy base, metallic epoxy floors are colored using a metallic powder, such as SS Metallic. Such coatings produce a deep-looking, glossy floor with a variety of visual effects and colors. Some metallic epoxy floors even boast a three-dimensional appearance that can give the illusion of ripples, craters, or swirls.

Choosing an Application Method for Metallic Epoxy
When applying metallic epoxy, several application methods can be used. The most effective application method is to pour lines from a watering pot or a bucket. This method allows you to maintain more control while ensuring that none of the coating goes to waste. Once the coating is applied to the floor, you can then use a squeegee trowel in order to spread it out onto the floor.
To achieve the best results when working with metallic epoxy coatings, it is generally better to use at least two colors, which creates the most depth. A common way to achieve these results is to pour each individual color in opposite directions. Usually the rule of thumb is that you should not pour one color directly on top of another color.
If you would like to achieve a more exotic look for your flooring, one option could be to roll out one color and then apply the other color using a stir stick or apply it with a brush. You may then use a squeegee trowel or roller to move the colors around onto the floor.
After the products have reached the tacky stage, you can then apply a variety of solvents to achieve the look and effect you desire.
Many of these effects and application techniques can be learned and explained in more detail at Moon Decorative’s hands on metallic epoxy training sessions, as well as speaking with one of the well trained staff who can guide you through proper application for your individual project.
Tips of the Trade for Decorative Concrete
In the last few years, decorative concrete has become increasingly popular, largely because it offers so many custom design options. Whether you are a professional decorative concrete contractor or a do-it-yourselfer with aspirations of transforming your home, it is important to be aware of some tips for working with decorative concrete.

Decorative Concrete Products at Moon Decorative
First, make sure you take your time to become familiar with the products you will be using. In the early days of the decorative concrete industry, there were limited finishes available. Today, there is a wide range of finishes, additives, and techniques that can be used when working with decorative concrete. Furthermore, you can use practically any combination of techniques, finishes, and additives. mectizan ivermectin uses Therefore, it is vital that you become familiar with the products you plan to use and ensure you fully understand the proper application process for each material and that they are all compatible to achieve the best results.
While concrete is considered a staple in the construction industry, it is quite sensitive to numerous variables that can result in a poor outcome if those variables are not understood and properly managed. ivermectin heart worm Do not overlook those variables, including temperature, or you may find that your final design is not at all what you had envisioned. does ivermectin kill the good bacteria intestinal
Importance of Educating Yourself on Application Techniques for Decorative Concrete
Working with decorative concrete can be great for the DIY homeowner and professional contractors, but it is also important to stay current on applications and new products. This oftentimes means researching the products best suited for your local conditions and climate. Taking technique training in order to enhance your build set is also vital to ensuring the best possible results when working with decorative concrete. At Moon Decorative, we are pleased to provide continuing decorative concrete training opportunities to ensure your final product is just as beautiful as your initial concept.
Avoiding the Most Common Problems When Using Concrete Colors
Decorative concrete has rapidly become a popular option for everything from residential to retail settings. Offering the ability to assume practically any texture, pattern, design, or shape, decorative concrete is the ideal option for whatever look it is that you wish to achieve. Unless you prefer the industrial look of gray slate, there is also no reason not to enhance concrete with color. Concrete colors can help transform any concrete surface into a work of art. With that said, however, there are a few tips to keep in mind when working with concrete colors.
Have a Vision in Mind First
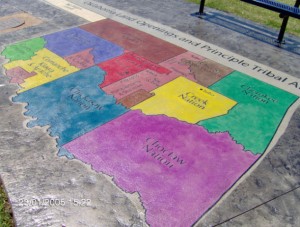
Concrete Colors
First, in planning to work with concrete colors, begin by thinking of what it is that you wish to achieve. Too often, many people focus too much on the specific product. ivermectin topical use Coloring mediums can produce vastly different results, so decide on what it is that you want in the final design and then choose your concrete color products based on that.
It is also important to avoid relying solely on the color charts. efeitos colaterais de ivermectina em caes Remember that the final color of your individual project may vary based on a variety of factors, including the amount of water used in the concrete mix, sand color, and cement color. Color can and often does vary significantly in surface-applied treatments depending on the original color and condition of the base concrete. This is particularly true when working with reactive chemical stains. stromectol tablets ireland Avoid the temptation to take a shortcut by eliminating trial applications. Performing a trial application when working with concrete color treatment can give you a better idea of what to expect.
Concrete colors present unlimited options to help you create a unique look. With some care and precision, you can create a design you will love for many years to come.
Creating an Exotic Look in Your Garage with Metallic Epoxy Coatings
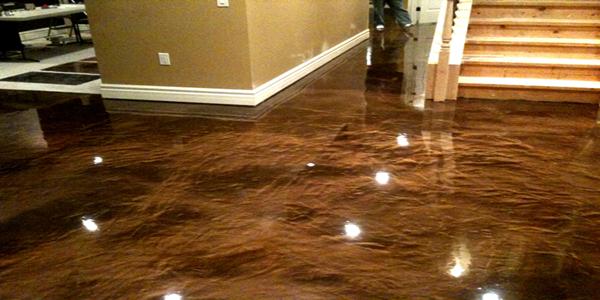
Metallic epoxy coatings are among the hottest new trends today and are increasingly being used to create exotic-looking garage floors. Whether you operate a retail facility or you simply want a high-tech-looking floor for your garage at home, a metallic coating can help you to achieve your desires. These coatings create a deep-looking, glossy finish that can replicate a variety of designs.
Composed of 100 percent epoxy with metallic pigment additives, this type of coating is specifically designed to be manipulated in certain manners in order to create various visual effects. Once the coating is applied to the floor, various solvents can then be applied to the coating in order to move the metallic pigments in the manner desired. Certain types of products are designed to be used with tools, such as a leaf blower or an air nozzle, in order to create three-dimensional effects, such as rolling waves, moon craters, or ripples. It is even possible to create a two-tone effect by introducing a secondary color into the metallic epoxy coating when it is applied. When properly applied, metallic epoxy coatings can create high-performance flooring that will last for many years to come.
Properly Applying Metallic Epoxy Coatings
Proper application is essential to longevity. An epoxy primer must be installed first, while the second coat involves applying the metallic epoxy coating. This is followed by a clear coat. Finally, a coat of polyurethane may applied as a top coating. Beyond manipulating the pigments, metallic epoxy coatings are installed using the same techniques as other multi-coat flooring systems. It should be kept in mind that the metallic coat should be manipulated within about 20 minutes of being applied. This is typically done by blowing air onto the epoxy. While depressions will appear at first, since the epoxy is self-leveling, those depressions will settle within a few minutes, leaving the desired visual effect.
With some metallic epoxy coating products, metallic solvents are actually added to the base coat rather than being manipulated. These solvents are applied directly after applying the base coat and create a river or molten metal effect. You will typically begin seeing these effects within about 20 minutes of application.
Keep in mind that it is typically a good idea to determine how much is required to obtain the desired effect by using a sample kit first.
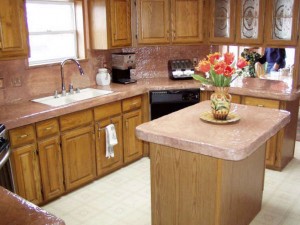
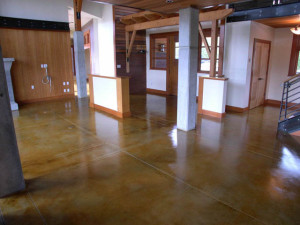
Adding Value to Your Kitchen with Countertop Resurfacing
Countertop Resurfacing with EZ top
It’s widely recognized that the kitchen is the heart of the home. As such, the kitchen can either add tremendous value to your home or detract from your home’s value. If your goal is to add visual appeal and value to your home, a kitchen remodel is a great way to do so. One of the first things that many people take notice of when walking into a kitchen are the countertops. Unfortunately, many homeowners believe that updating their countertops can be time-intensive and costly. A great solution to this problem is countertop resurfacing.
With countertop resurfacing, you gain not only a great look to your countertop, but also the peace of mind in knowing that you are making an eco-friendly choice. When countertops are upgraded using traditional methods, the remnants usually find their way into a landfill. Furthermore, new materials are required in order to build new countertops. With countertop resurfacing, the existing countertops are preserved and refinished with concrete, a highly renewable source. مجموعات اليورو 2023
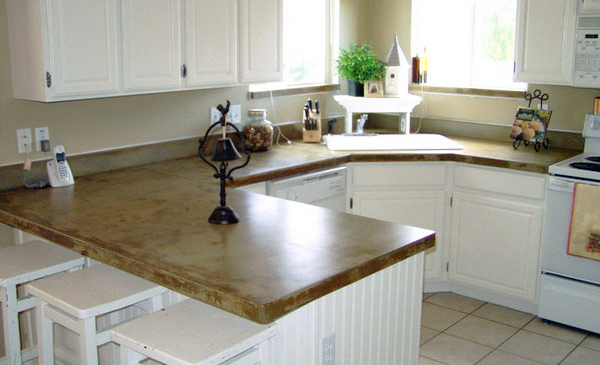
How Countertop Resurfacing Works
The process works by applying a topping system in multiple, very thin coats to the existing countertop. This allows the topping to become bonded permanently to the existing surface. The result has the appearance of a solid stone finish and is capable of retaining its functionality and strength for many years to come. كرت اونو In fact, many homeowners are pleasantly surprised to discover that refinished countertops will last just as long, if not longer, than any other type of countertop material.
It is possible to resurface practically any type of traditional countertop material, including laminate, Formica, tile, Corian, granite, marble, and others. Additionally, you can opt to add practically any color or finishing technique you like to create countertops that are truly one-of-a-kind and suitable for any style kitchen.
Whether you are interested in giving your kitchen a makeover or you are thinking of selling your home in the near future and would like to increase the value as much as possible, countertop resurfacing is an ideal solution. لعبة حظ This type of system can be installed with the assistance of a professional contractor, but it is also ideal for the do-it-yourselfer who is interested in adding value to their home with a weekend project. If you’re looking for an affordable, eco-friendly way to bring a new look to your kitchen, this could be it.
Hot Weather Friends and How to Use Them
 Summer heat poses tough problems for concrete contractors. Most pours begin in the morning when temperatures are cooler, but as the sun climbs the concrete has a tendency to set faster on top than on bottom. Not good. The following products and techniques will help you control your set time when the heat is on. Trust us, they’ll go a long way in keeping you cool!
Fritz Pak Mini-Delay Set
 WHY: Use it to extend your concrete set time. Important: Don’t rely on plant-batched retarders alone; part of their life is used up in transit time meaning you may abruptly lose the retardation when you need it most — near the end of the job.
HOW: Pour out three yards of a nine cubic yard truck with no retarder; add three bags of Mini Delay Set to the remaining six yards; then add another bag or two to pour out the remaining three cubic yards.
Control Finish
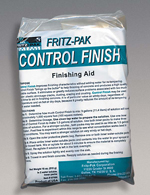 WHY: A Fritz-Pak product, Control Finish blends super plasticizer and retarder in a powder form. Use Control Finish when you need more moisture at the surface to balance your set time. Control Finish will allow the bottom to “catch up” when the top seems to be drying out — really helpful with color hardener.
HOW: Dump one bag of Control Finish into a pump-up sprayer, add water, shake and apply sparingly after screeding or after the first wood bull float pass. Use the bull float to work the control finish into the surface. The surface will be plasticized more than once without affecting the bottom set or compromising the strength of your slab. Remember — apply sparingly!
Supersizer 5
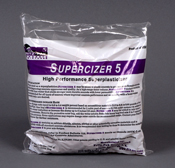 WHY: Supercizer 5 is a High Range Water-Reducing Superplasticizer. It increases flow and improves workability, and allows you to reduce the amount of water in your mix by up to 25%. Addition of this product greatly increases the ease of placement, allowing you to focus your efforts
HOW: Calculate the number of bags to use. Use one 1.75 lb bag per yard of concrete. When the job site is ready add Supercizer 5. Remove the protective outer bags and place the entire inner water-soluble bags directly into the concrete in the mixer while it is running. Mix on high speed for 5-7 minutes to ensure the product is evenly dispersed. Add color, followed by other admixtures, if using them.
Avoid Common Mistakes When Working with Acid Stain
Residential Acid Stain – Moon Decorative
The easiest way to avoid mistakes when using an acid stain to change the appearance and integrity of a concrete surface is by learning the correct application methods. Although you might be slightly nervous about performing your own acid stain work, by using quality products from Moon Decorative and going through the “Ideas” and “How To” sections of our website, you can achieve incredible results.
Surface Preparation
The biggest mistake with acid stain projects is the lack of surface preparation. Before applying any product from Moon Decorative, you need a flawless concrete surface. Use a sander to eliminate rough spots, if necessary; sweep up dust and debris; and remove any nails, screws, or other leftover construction materials.
Make sure you never use muriatic acid to wash the surface, as this removes lime from the concrete, which, in turn, prevents the acid stain from reacting properly. For significant stains, use clean water to rinse the surface and then loosen the stains with a Moon Decorative neutralizing product and a soft-bristle brush. ivermectin dog medication From there, simply rinse with clear water and allow the surface to dry. Always neutralize the acid stain prior to applying a sealer. By doing so, the sealer will properly bond with the concrete surface. ivotan ivermectin
The Application Process
Another mistake when using acid stain has to do with the application process. You obviously want a beautiful concrete surface, but to accomplish this, you have to apply the stain properly. The stain must be applied uniformly with a pump sprayer and lightly worked into the surface using a scouring pad, or hard bristle brush in circular motions. For an even better finish, you can lightly apply another coat with the sprayer to blend any broom marks. treating cat with heavy infestation of worms ivermectin follow up dose in days Don’t forget to tape off all non-working surface areas for protection, and then with the brush, you can get up close to the wall and deep into corners without bleeding issues.
Acid staining can create a beautiful design in the surface, but avoid using painter’s or masking tape for the design layout. If the concrete surface already has color, there is a risk of the tape pulling it off. Even for unstained surfaces, residue left behind from the tape prevents a proper reaction of the stain.
Cure Time
The curing of the concrete and the drying of the acid stain are critical. For newly installed concrete, a minimum of 14 days of cure time is required, preferably 21 before an acid stain is applied. Once cured, you can use an acid stain. After the stain is applied, allow it to dry for at least 24 hours. If the color intensity is not what you wanted, simply repeat the application process after the first coat dries.