What You Need to Know about Using Metallic Epoxy
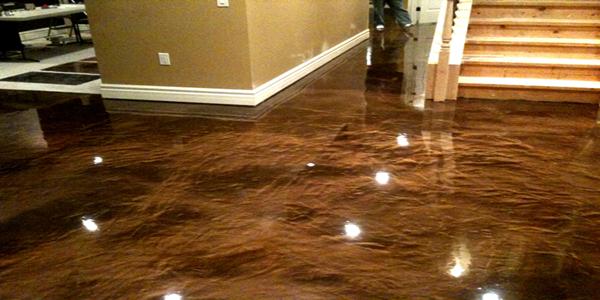
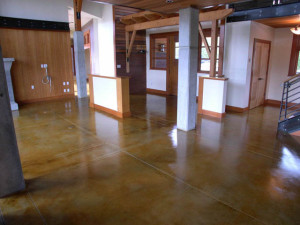
Metallic floor coatings provide an exotic look to residences and retail facilities. With this product, it is possible to create completely distinctive flooring because no two metallic floors are ever the same. Utilizing a polyaspartic or clear epoxy base, metallic epoxy floors are colored using a metallic powder, such as SS Metallic. Such coatings produce a deep-looking, glossy floor with a variety of visual effects and colors. Some metallic epoxy floors even boast a three-dimensional appearance that can give the illusion of ripples, craters, or swirls.
Choosing an Application Method for Metallic Epoxy
When applying metallic epoxy, several application methods can be used. The most effective application method is to pour lines from a watering pot or a bucket. This method allows you to maintain more control while ensuring that none of the coating goes to waste. Once the coating is applied to the floor, you can then use a squeegee trowel in order to spread it out onto the floor. To achieve the best results when working with metallic epoxy coatings, it is generally better to use at least two colors, which creates the most depth. A common way to achieve these results is to pour each individual color in opposite directions. Usually the rule of thumb is that you should not pour one color directly on top of another color. If you would like to achieve a more exotic look for your flooring, one option could be to roll out one color and then apply the other color using a stir stick or apply it with a brush. You may then use a squeegee trowel or roller to move the colors around onto the floor. After the products have reached the tacky stage, you can then apply a variety of solvents to achieve the look and effect you desire. Many of these effects and application techniques can be learned and explained in more detail at Moon Decorative’s hands on metallic epoxy training sessions, as well as speaking with one of the well trained staff who can guide you through proper application for your individual project.Tips of the Trade for Decorative Concrete
In the last few years, decorative concrete has become increasingly popular, largely because it offers so many custom design options. Whether you are a professional decorative concrete contractor or a do-it-yourselfer with aspirations of transforming your home, it is important to be aware of some tips for working with decorative concrete.
Decorative Concrete Products at Moon Decorative
Importance of Educating Yourself on Application Techniques for Decorative Concrete
Working with decorative concrete can be great for the DIY homeowner and professional contractors, but it is also important to stay current on applications and new products. This oftentimes means researching the products best suited for your local conditions and climate. Taking technique training in order to enhance your build set is also vital to ensuring the best possible results when working with decorative concrete. At Moon Decorative, we are pleased to provide continuing decorative concrete training opportunities to ensure your final product is just as beautiful as your initial concept.Creating an Exotic Look in Your Garage with Metallic Epoxy Coatings
Properly Applying Metallic Epoxy Coatings
Proper application is essential to longevity. An epoxy primer must be installed first, while the second coat involves applying the metallic epoxy coating. This is followed by a clear coat. Finally, a coat of polyurethane may applied as a top coating. Beyond manipulating the pigments, metallic epoxy coatings are installed using the same techniques as other multi-coat flooring systems. It should be kept in mind that the metallic coat should be manipulated within about 20 minutes of being applied. This is typically done by blowing air onto the epoxy. While depressions will appear at first, since the epoxy is self-leveling, those depressions will settle within a few minutes, leaving the desired visual effect. With some metallic epoxy coating products, metallic solvents are actually added to the base coat rather than being manipulated. These solvents are applied directly after applying the base coat and create a river or molten metal effect. You will typically begin seeing these effects within about 20 minutes of application. Keep in mind that it is typically a good idea to determine how much is required to obtain the desired effect by using a sample kit first.Adding Value to Your Kitchen with Countertop Resurfacing
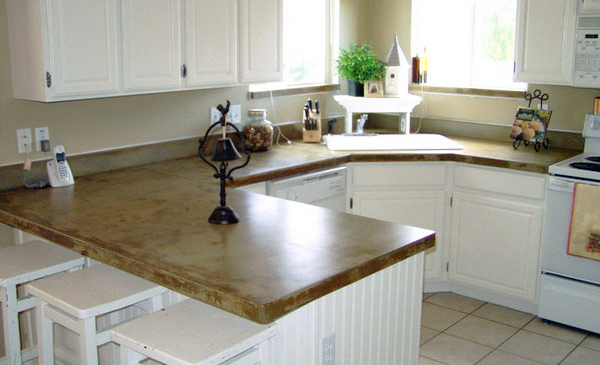
Countertop Resurfacing with EZ top
Hot Weather Friends and How to Use Them
 Summer heat poses tough problems for concrete contractors. Most pours begin in the morning when temperatures are cooler, but as the sun climbs the concrete has a tendency to set faster on top than on bottom. Not good. The following products and techniques will help you control your set time when the heat is on. Trust us, they’ll go a long way in keeping you cool!
Fritz Pak Mini-Delay Set
 WHY: Use it to extend your concrete set time. Important: Don’t rely on plant-batched retarders alone; part of their life is used up in transit time meaning you may abruptly lose the retardation when you need it most — near the end of the job.
HOW: Pour out three yards of a nine cubic yard truck with no retarder; add three bags of Mini Delay Set to the remaining six yards; then add another bag or two to pour out the remaining three cubic yards.
WHY: Use it to extend your concrete set time. Important: Don’t rely on plant-batched retarders alone; part of their life is used up in transit time meaning you may abruptly lose the retardation when you need it most — near the end of the job.
HOW: Pour out three yards of a nine cubic yard truck with no retarder; add three bags of Mini Delay Set to the remaining six yards; then add another bag or two to pour out the remaining three cubic yards.
Control Finish
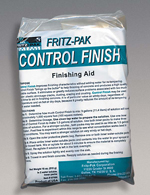 WHY: A Fritz-Pak product, Control Finish blends super plasticizer and retarder in a powder form. Use Control Finish when you need more moisture at the surface to balance your set time. Control Finish will allow the bottom to “catch up” when the top seems to be drying out — really helpful with color hardener.
HOW: Dump one bag of Control Finish into a pump-up sprayer, add water, shake and apply sparingly after screeding or after the first wood bull float pass. Use the bull float to work the control finish into the surface. The surface will be plasticized more than once without affecting the bottom set or compromising the strength of your slab. Remember — apply sparingly!
WHY: A Fritz-Pak product, Control Finish blends super plasticizer and retarder in a powder form. Use Control Finish when you need more moisture at the surface to balance your set time. Control Finish will allow the bottom to “catch up” when the top seems to be drying out — really helpful with color hardener.
HOW: Dump one bag of Control Finish into a pump-up sprayer, add water, shake and apply sparingly after screeding or after the first wood bull float pass. Use the bull float to work the control finish into the surface. The surface will be plasticized more than once without affecting the bottom set or compromising the strength of your slab. Remember — apply sparingly!
Supersizer 5
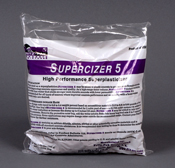 WHY: Supercizer 5 is a High Range Water-Reducing Superplasticizer. It increases flow and improves workability, and allows you to reduce the amount of water in your mix by up to 25%. Addition of this product greatly increases the ease of placement, allowing you to focus your efforts
HOW: Calculate the number of bags to use. Use one 1.75 lb bag per yard of concrete. When the job site is ready add Supercizer 5. Remove the protective outer bags and place the entire inner water-soluble bags directly into the concrete in the mixer while it is running. Mix on high speed for 5-7 minutes to ensure the product is evenly dispersed. Add color, followed by other admixtures, if using them.
WHY: Supercizer 5 is a High Range Water-Reducing Superplasticizer. It increases flow and improves workability, and allows you to reduce the amount of water in your mix by up to 25%. Addition of this product greatly increases the ease of placement, allowing you to focus your efforts
HOW: Calculate the number of bags to use. Use one 1.75 lb bag per yard of concrete. When the job site is ready add Supercizer 5. Remove the protective outer bags and place the entire inner water-soluble bags directly into the concrete in the mixer while it is running. Mix on high speed for 5-7 minutes to ensure the product is evenly dispersed. Add color, followed by other admixtures, if using them. Avoid Common Mistakes When Working with Acid Stain
Residential Acid Stain – Moon Decorative
The easiest way to avoid mistakes when using an acid stain to change the appearance and integrity of a concrete surface is by learning the correct application methods. Although you might be slightly nervous about performing your own acid stain work, by using quality products from Moon Decorative and going through the “Ideas” and “How To” sections of our website, you can achieve incredible results.
Surface Preparation
The biggest mistake with acid stain projects is the lack of surface preparation. Before applying any product from Moon Decorative, you need a flawless concrete surface. Use a sander to eliminate rough spots, if necessary; sweep up dust and debris; and remove any nails, screws, or other leftover construction materials.
Make sure you never use muriatic acid to wash the surface, as this removes lime from the concrete, which, in turn, prevents the acid stain from reacting properly. For significant stains, use clean water to rinse the surface and then loosen the stains with a Moon Decorative neutralizing product and a soft-bristle brush. ivermectin dog medication From there, simply rinse with clear water and allow the surface to dry. Always neutralize the acid stain prior to applying a sealer. By doing so, the sealer will properly bond with the concrete surface. ivotan ivermectin
The Application Process
Another mistake when using acid stain has to do with the application process. You obviously want a beautiful concrete surface, but to accomplish this, you have to apply the stain properly. The stain must be applied uniformly with a pump sprayer and lightly worked into the surface using a scouring pad, or hard bristle brush in circular motions. For an even better finish, you can lightly apply another coat with the sprayer to blend any broom marks. treating cat with heavy infestation of worms ivermectin follow up dose in days Don’t forget to tape off all non-working surface areas for protection, and then with the brush, you can get up close to the wall and deep into corners without bleeding issues.
Acid staining can create a beautiful design in the surface, but avoid using painter’s or masking tape for the design layout. If the concrete surface already has color, there is a risk of the tape pulling it off. Even for unstained surfaces, residue left behind from the tape prevents a proper reaction of the stain.
Cure Time
The curing of the concrete and the drying of the acid stain are critical. For newly installed concrete, a minimum of 14 days of cure time is required, preferably 21 before an acid stain is applied. Once cured, you can use an acid stain. After the stain is applied, allow it to dry for at least 24 hours. If the color intensity is not what you wanted, simply repeat the application process after the first coat dries.
Tips for Cleaning a Concrete Slab before Applying an Acid Stain
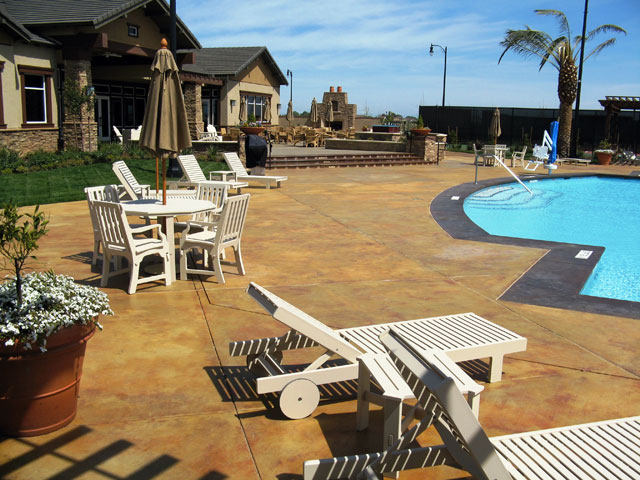
Acid Stain Concrete Around Pool
Acceptable Cleaners for Cleaning a Concrete Slab
Instead, it is much better to use a solution of trisodium phosphate, or TSP. This should be applied using a scrub brush. You may find that using a long-handled scrub brush makes it easier to clean your concrete slab. If you find this to be too much work, you might find it easier to use a pressure washer. While grease stains can be difficult to clean from concrete, if you do have such stubborn stains, mineral spirits or lacquer thinner may help. Keep in mind that even with a significant amount of scrubbing, there may still be patches left on your concrete slab that will not accept an acid stain. الرالي This is usually due to a lack of lime content within the concrete. ترتيب بوكر This is important, as the lime is necessary for the chemical reaction to occur with the acid stain. When this is the case, it may be necessary to apply a faux finish that will match the surrounding acid stain using a concrete dye or solvent based stain.DIY Epoxy Coating — What You Need to Know

Epoxy Coating DIY
Prepping for a DIY Epoxy Coating
Before you begin to apply an epoxy coating, it is vital that the floor be properly cleaned and prepared. Begin by removing furnishings and any other items from the area. Next, you should clean any oil stains that are present. It may be necessary to use a sander across the floor to completely remove stains and smooth out the flooring. العاب كازينو للكبار This will help ensure it will accept the epoxy coating and is particularly important for flooring that contains old layers of sealant, epoxy, or paint. ملاعب كاس العالم 2023 If you are not sure if there is a layer of sealant on the floor, try pouring water onto the floor. If the water forms beads on top of the flooring rather than soaking into the floor, there is a layer of sealant. After sanding or grinding the floor, you will need to repair any chips or divots and drive in any screw or nails that may be sprouting up from the floor. من الفائز بكأس العرب Each of these steps is essential to prepping the floor before the primer is applied.Applying the Epoxy Coating
Epoxy typically comes in several different varieties, but the most common varieties are water-based or solvent-based. Water-based epoxy coatings are usually the preferred option for DIY epoxy coating projects, as they do not produce any toxic fumes. Once the floor has been prepped, the next step in a DIY epoxy coating project is to apply the primer. Begin by applying the primer by brushing around the perimeter of the floor to get up against the walls and in the corners, this is called “cutting in” the floor. A roller is usually best for covering the rest of the floor. Sometimes a squeegee can be used to quickly spread the primer before back-rolling with the roller. Once the first coat is applied, you will need to allow it to dry for several hours. It is absolutely imperative to make certain that the primer has dried before moving to the next step. You should be aware that it could take up to six hours for the primer to dry. It is far better to wait and allow the primer to dry than to try to rush the project, which will typically result in a poor outcome. Once the primer is dry, you can then apply the epoxy finish top coat. The top coat is installed in a similar manner to the primer coat, understanding that this is the final coat and should be done precisely and meticulously. This coat will need to be allowed to set for a minimum of 72 hours before vehicular traffic, but can often be walked on in sock feet the following day.Stamped Concrete Tools of the Trade
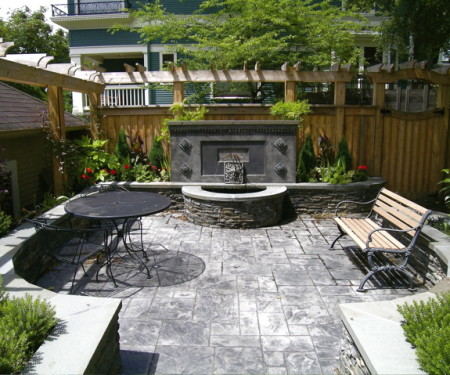
Stamped Concrete
Decorative Concrete Stamping Supplies
A variety of stamping accessories is also usually necessary, depending on the type of desired look to be achieved. The various types of accessories that may be necessary include chisels, texture rollers, curve tools, texture shoes, tampers, and touch-up wheels. While flooring is one of the most popular surfaces for decorative concrete today, decorative techniques can be applied to almost any concrete surface, including concrete walls. When applying stamping and other techniques to decorative cement walls, special tools may be required. nyerögépes játékok ingyen letöltés Such tools might include vertical texture and joint rollers and edge wall tools. melyik a legjobb fogadoiroda Along with the tools listed above, the other tools may also be necessary to achieve desired results for decorative concrete projects. For instance, a floor edger is often used for grinding decorative cement floors along wall edges. Walk-behind edgers are more commonly used for large projects that entail a significant amount of edging work. ingyen nyerőgépes játékok kockás This is a critical step for stamped concrete overlays to ensure a proper bond to a well prepared substrate. In some instances, handheld grinding tools may also be used for decorative concrete work. With these types of tools, it is possible to achieve beautiful graphic artwork by making detailed patterns and saw-cuts in concrete surfaces. Such tools typically contain diamond-tipped blades that are excellent for creating free-form graphics, touching up patterns, and completing saw-cuts to mimic grout and tile lines.Greener Options for Homeowners
Concrete staining is a great way to bring life to concrete or change-up the look of an older and perhaps even dated or damaged floor. At Moon Decorative, we carry a variety of decorative concrete products, including water-borne stain to help contractors with homeowners who insist on a greener option.SS Rainbow Color System is simple and incredibly user-friendly
 Unlike acid stain, after the application of water-borne stains, the surface does not need to be neutralized and rinsed; therefore, very little clean up is necessary. Rainbow has a low VOC (volatile organic compound) count and it won’t damage your lawn like acid stains. SS Rainbow has no odor, no need to block HVAC systems to prevent the spread of smell while using SS Rainbow.
Water-borne stains are non-reactive solutions that deposit pigment into the open pores of the concrete, producing translucent colors that are more vibrant than acid stains. Almost any color is achievable with water-based stains, from soft pastels to vibrant tones. And when we say any color, we literally have a fan deck of colors you can choose from. Because the color doesn’t depend on reaction with the concrete, the end result is a color that is more uniform and predictable.
Unlike acid stain, after the application of water-borne stains, the surface does not need to be neutralized and rinsed; therefore, very little clean up is necessary. Rainbow has a low VOC (volatile organic compound) count and it won’t damage your lawn like acid stains. SS Rainbow has no odor, no need to block HVAC systems to prevent the spread of smell while using SS Rainbow.
Water-borne stains are non-reactive solutions that deposit pigment into the open pores of the concrete, producing translucent colors that are more vibrant than acid stains. Almost any color is achievable with water-based stains, from soft pastels to vibrant tones. And when we say any color, we literally have a fan deck of colors you can choose from. Because the color doesn’t depend on reaction with the concrete, the end result is a color that is more uniform and predictable.